Categories
Food Lifestyle

Spooky Cheese Board

Spooky Cheese Board

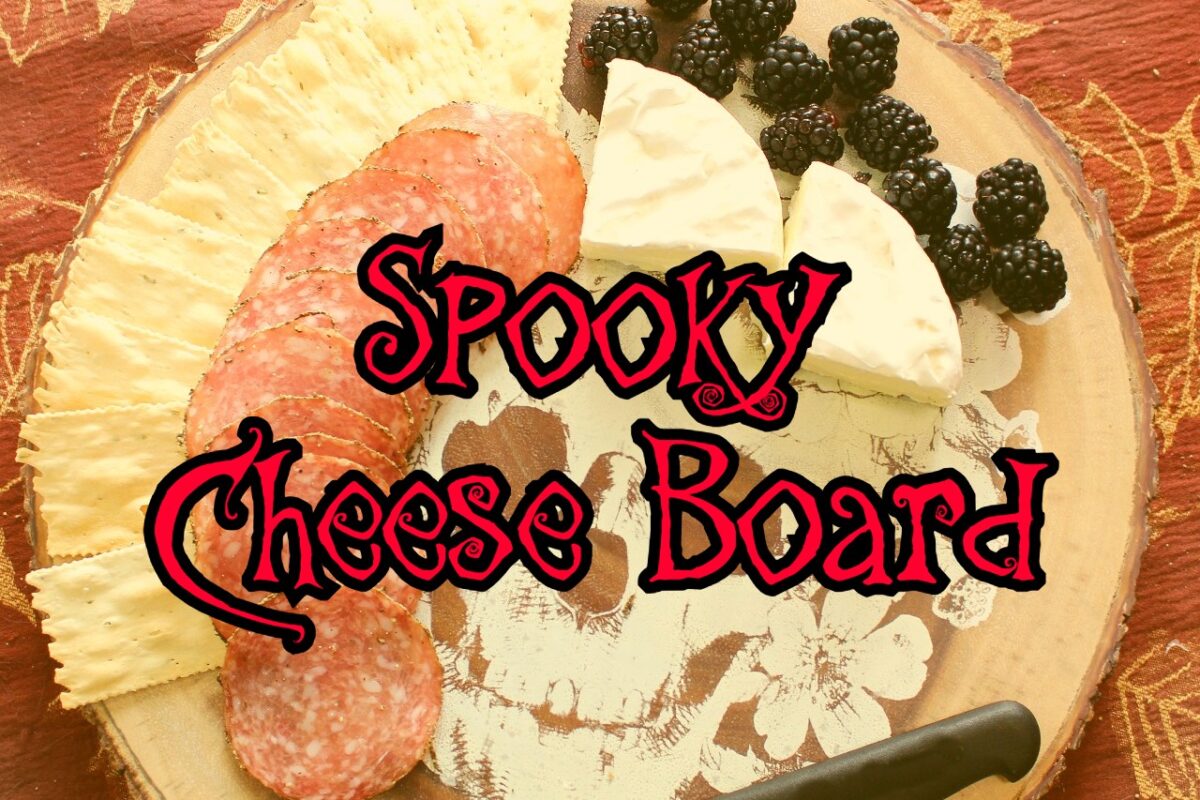
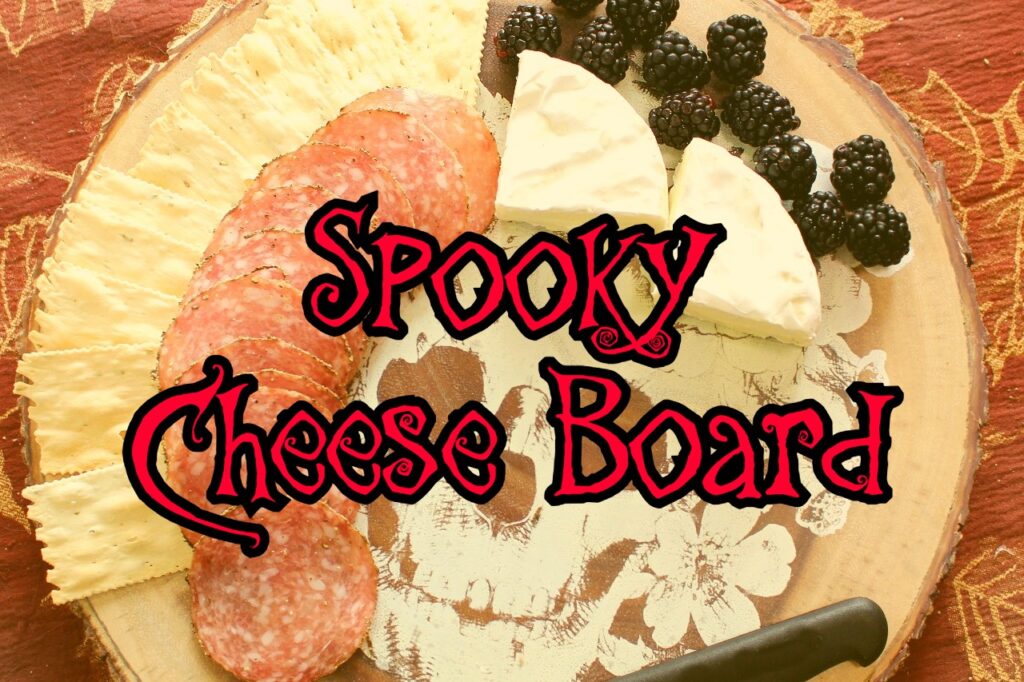
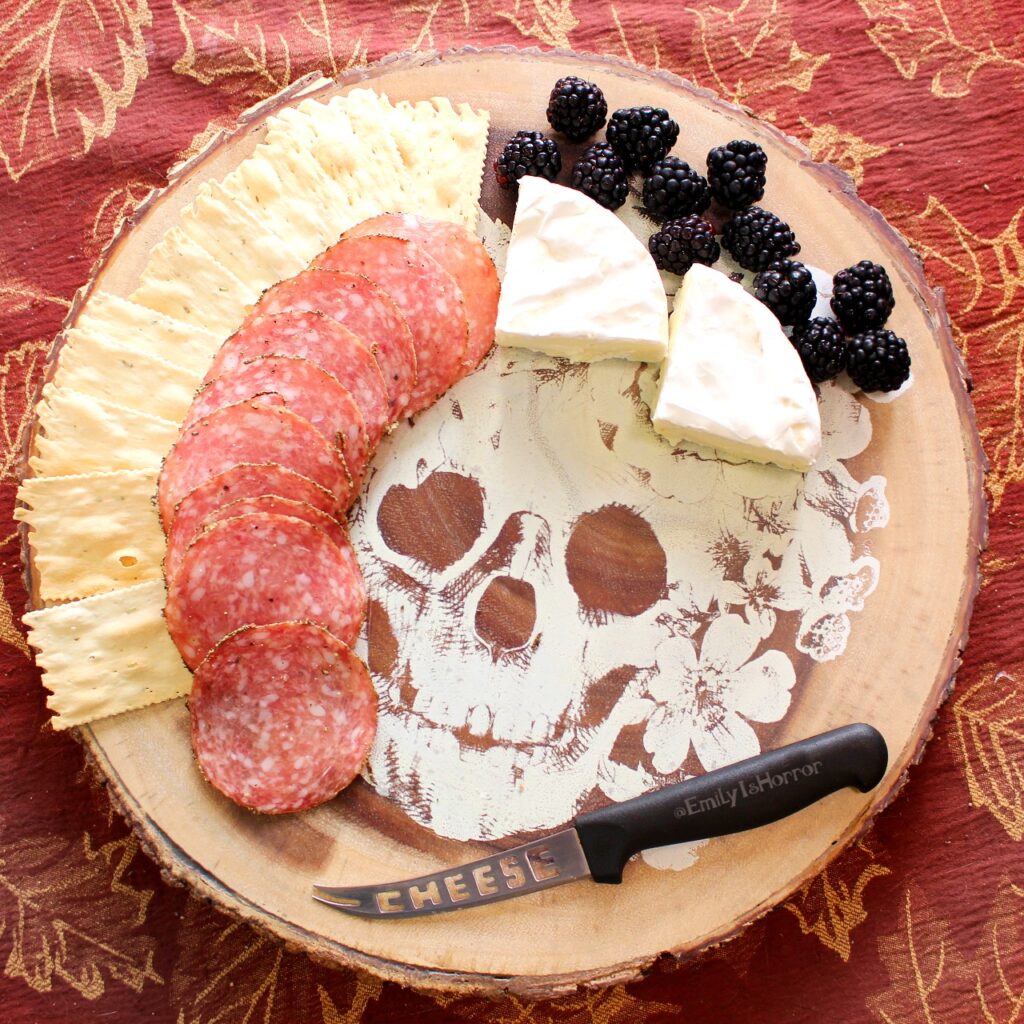
No gathering of mine is complete without a cheese board. My friends will attest that I have occasionally even made two at once for my annual birthday celebration, just so I could try some different flavor combinations. Here are some of my suggestions to create the perfect spooky cheese board for your next party.

Start with Your Board

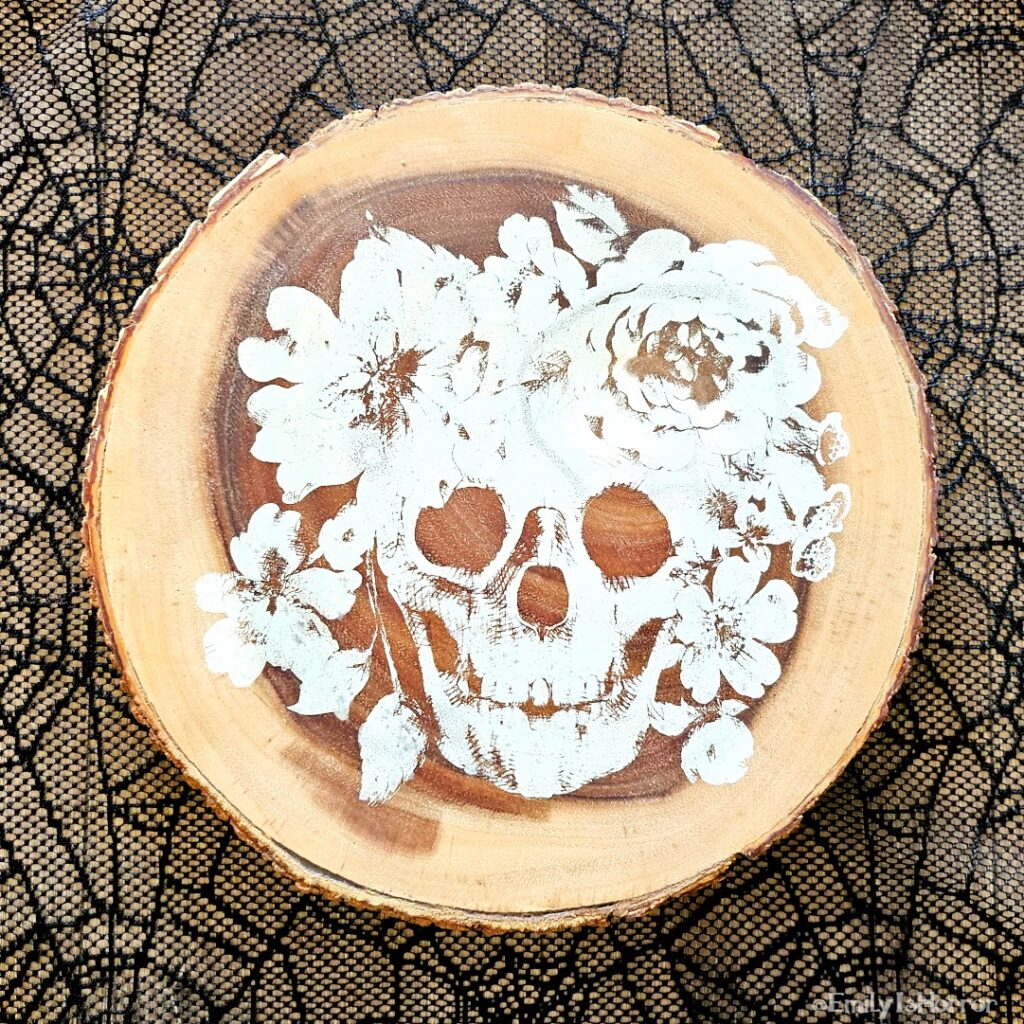
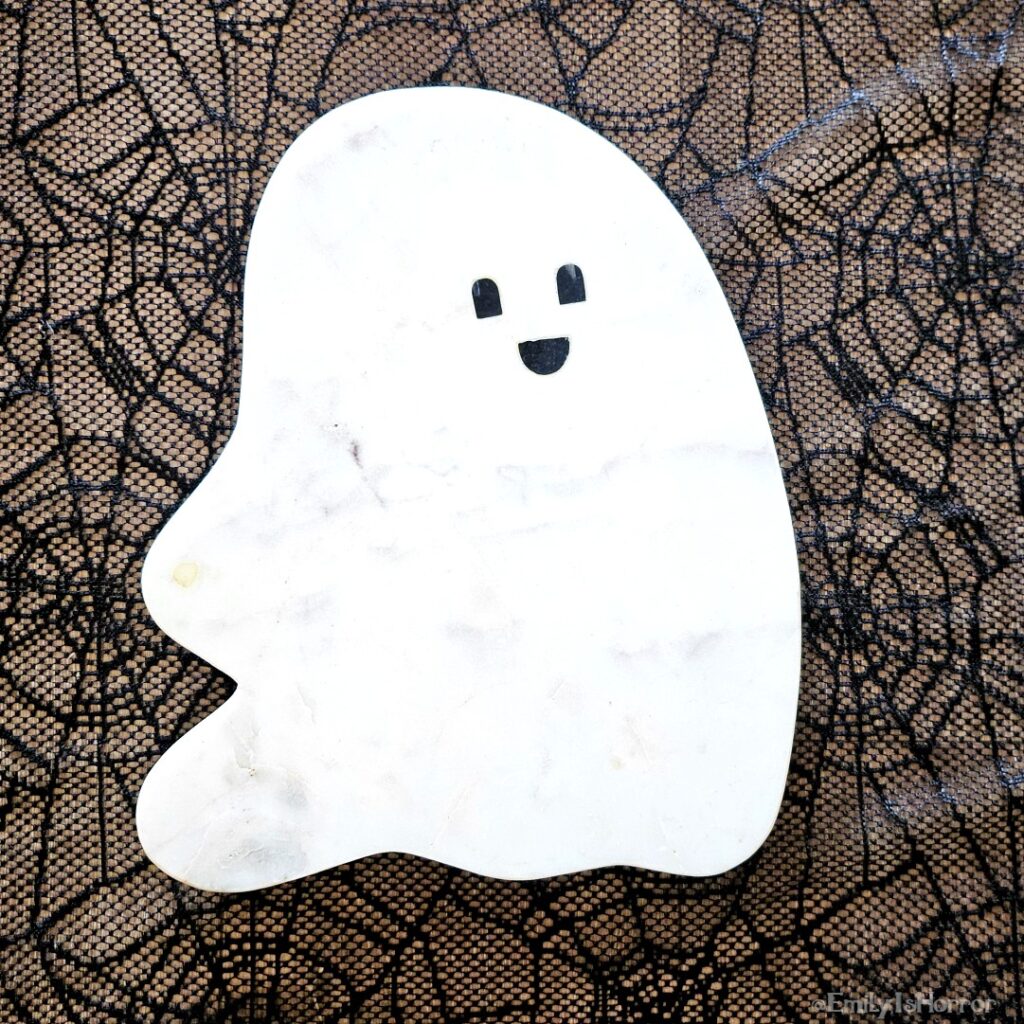
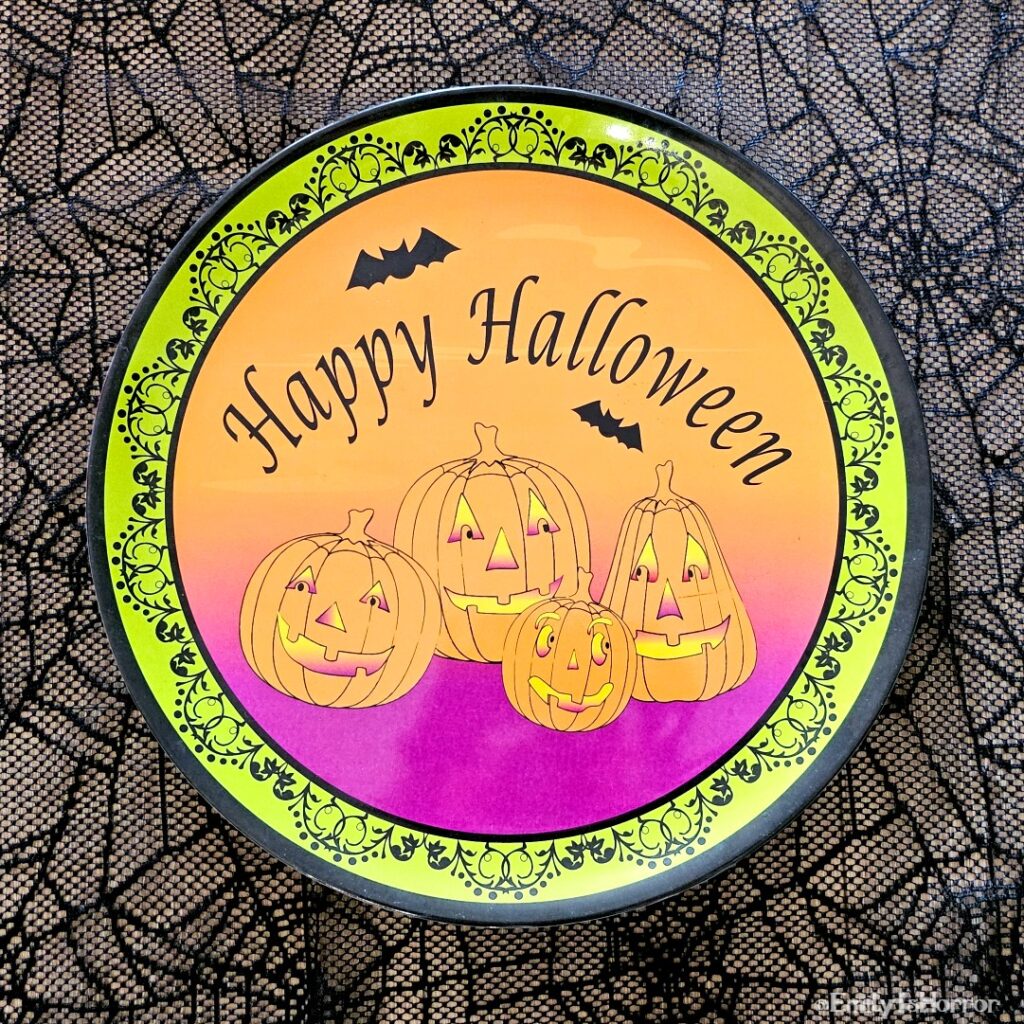
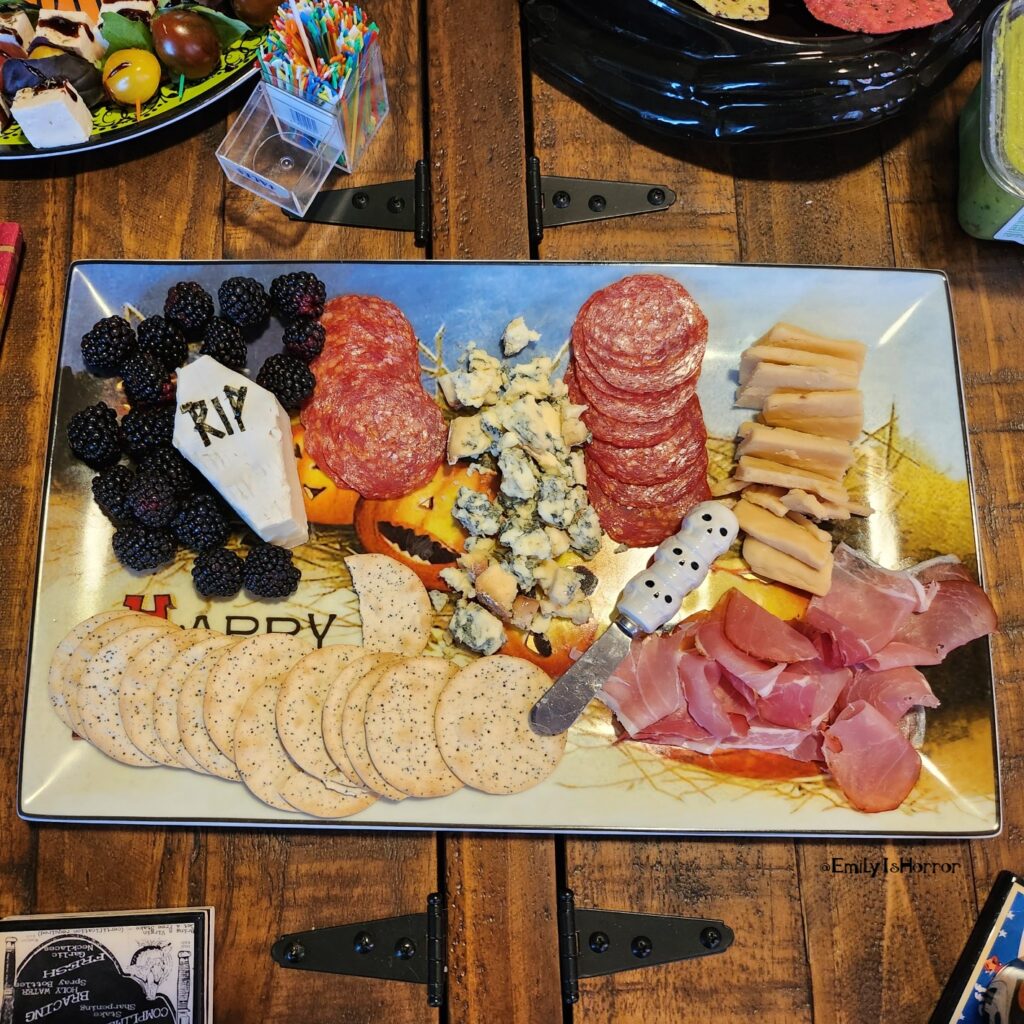
I create my spooky cheese boards atop Halloween-themed platters. This instantly adds to the Halloween feel before the food has even been placed. Knowing your board size will also inform the amount of food you can place on it. One cheese along with some fruit and crackers may be best for a small plate. Large platters can accommodate multiple cheeses and charcuterie. 

Also, be sure to have different cheese knives on hand for each cheese you intend to use – so that the flavors don’t mix.

Choose Your Ingredients

My go-to cheese is a brie wedge. I love to pair it with blackberries, charcuterie (especially prosciutto), and gore-met – I mean, gourmet crackers. From there I add other items depending on the scale of the platter and what interests me at the store. 

A general rule of thumb for a full platter is 1 hard cheese, 1 soft cheese, and 1 blue cheese; 3-4 cured meats; and a mix of accompaniments like fruits, jams, nuts, and crackers. There should be about 1-2 ounces of cheese & 1-2 ounces of meats per person. 

Here are a few suggestions for each element:

  • Hard Cheeses:
    • Parmigiano-Reggiano
    • Aged Cheddar
    • Gruyère
    • Gouda
    • Leyden
  • Soft Cheeses:
    • Brie 
    • Goat Cheese
    • Burrata
  • Blue Cheeses:
    • Roquefort
    • Gorgonzola
    • Stilton
  • Charcuterie:
    • Prosciutto
    • Salami
    • Pepperoni
    • Pancetta
    • Chorizo
  • Fresh Fruits:
    • Grapes
    • Apples
    • Blackberries
    • Strawberries
  • Dried Fruits:
    • Apricots
    • Figs
    • Cranberries
  • Nuts:
    • Almonds
    • Walnuts
    • Pecans
  • Spreads:
    • Fig Jam
    • Honey
    • Fruit Preserves
  • Crackers/Breads:
    • Water Crackers
    • Baguette slices
    • Crostini

Popular Halloween boards often feature ingredients with lush purples, blues, and oranges. 
Placement & Presentation

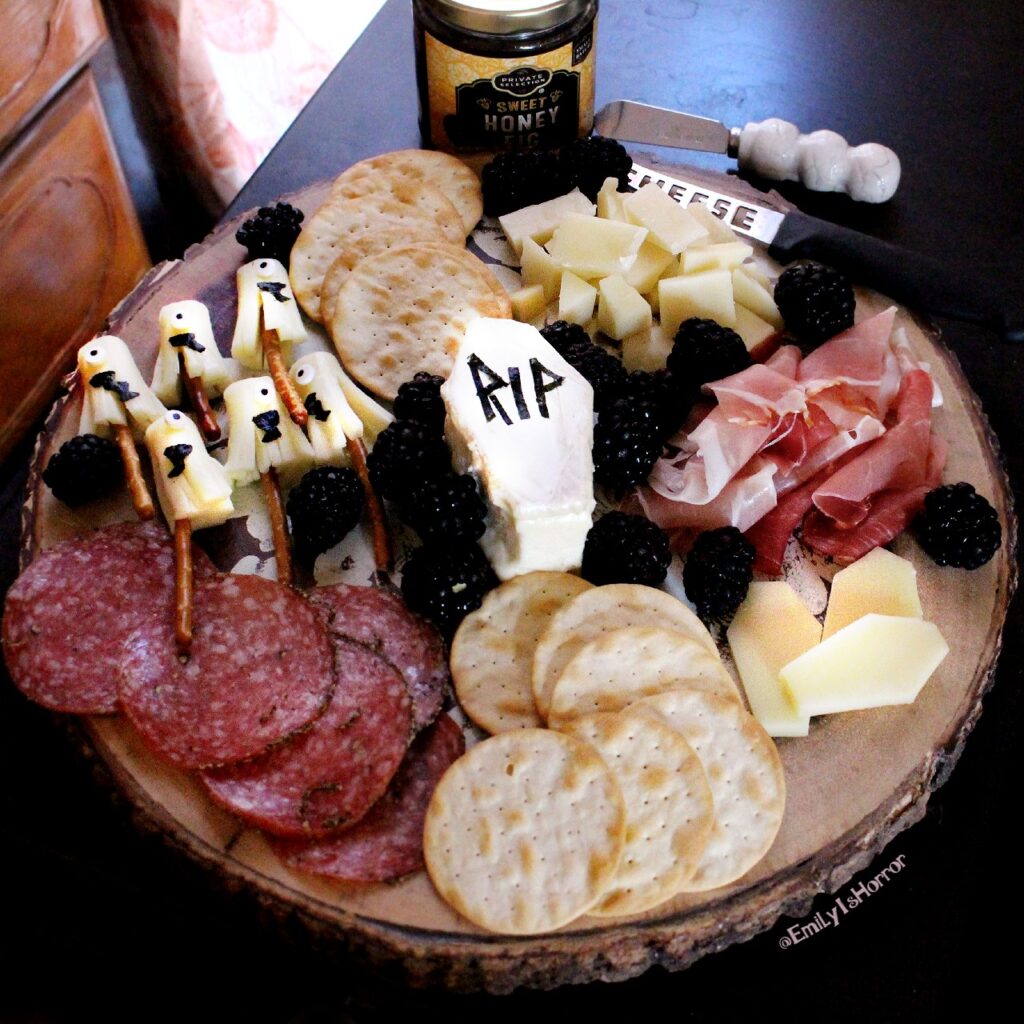
First place your cheese and large jars (if applicable), then add your other elements around them. 

To add some spooky fun, try some of these presentations:

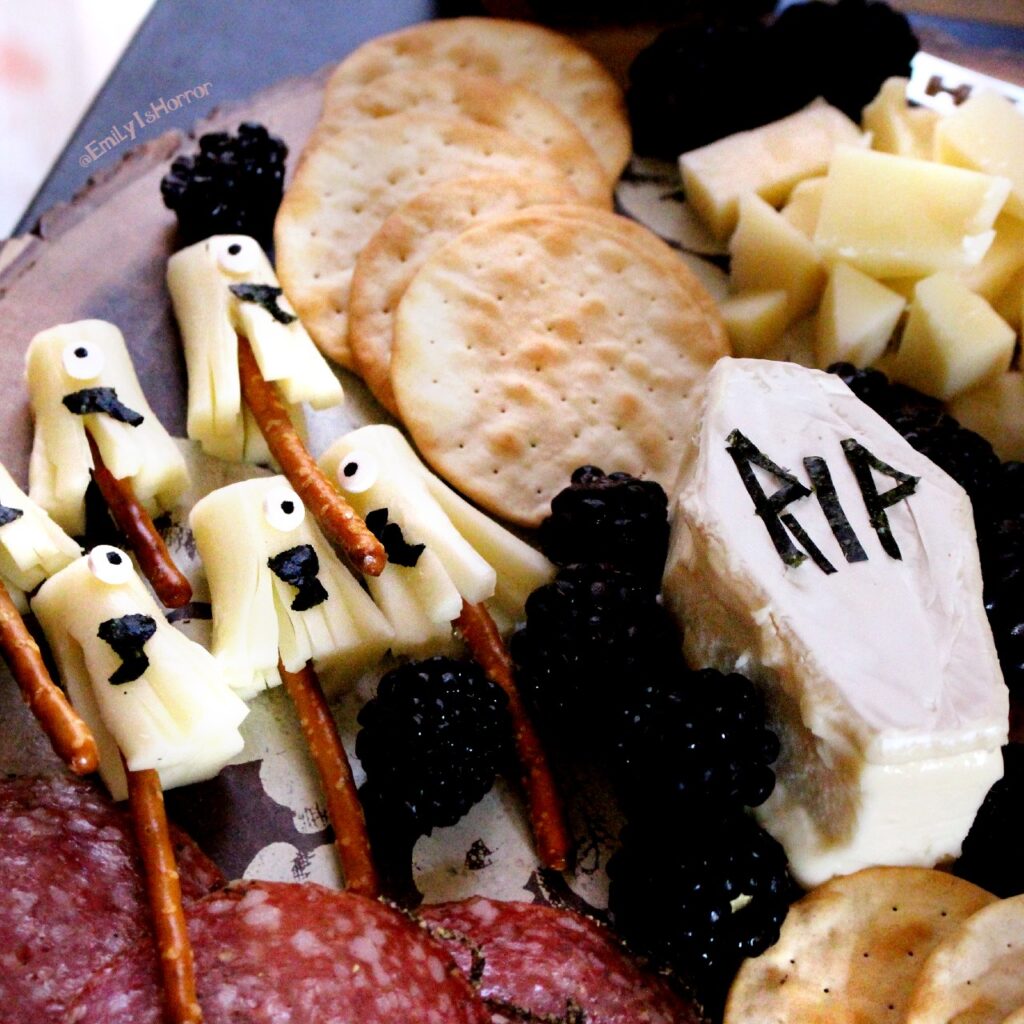
  • Cut off the tip and top corners of your brie wedge to create a coffin shape. Add seaweed strips to spell out “RIP”.
  • Pretzels & string cheese make fun shapes. 
    • Witches’ Brooms: Cut the string cheese into 1″ pieces. Stick the pretzel in the top and pull apart the cheese at the bottom to make a broom shape.
    • Kasa Obake: To create this yokai, cut the string cheese into 1.5″ pieces. Pull apart the cheese at the bottom and stick the pretzel into the end with the pulled apart cheese. Add a candy eye and use seaweed to make a long tongue. 
  • Use cookie cutters to cut the cheese into Halloween shapes – like pumpkins or ghosts. You can also just a knife to make coffin shapes.
  • Add mini pumpkins or plastic skeletons to your platter for aesthetics.

Ready to create your own spooky cheese board? Share your creations with me on Facebook & Instagram.

Want more food ideas for your next party? Check out my post on 5 Ways to Make Spooky Meals

Halloween Drawings
Day 27 of the #Emilys100DaysOfHalloween challenge is: Draw a Halloween Picture. My artistic talents reside in photography, film, and papercraft. That, however, does not stop me from picking up a
Read More »

Learn a Halloween Song
Day 26 of the #Emilys100DaysOfHalloween challenge: Learn to Play a Halloween Song. I have been playing the piano since I was a little girl. I love to try new songs



Read More »

Spooky Artists

Day 25 of the #Emilys100DaysOfHalloween challenge is: Support a Horror Artisan. With AI slop flooding the world, now more than ever it is important to celebrate the creativity and beauty

Read More »
Categories
Food Lifestyle

Monster Cereals 2026

Monster Cereals 2026

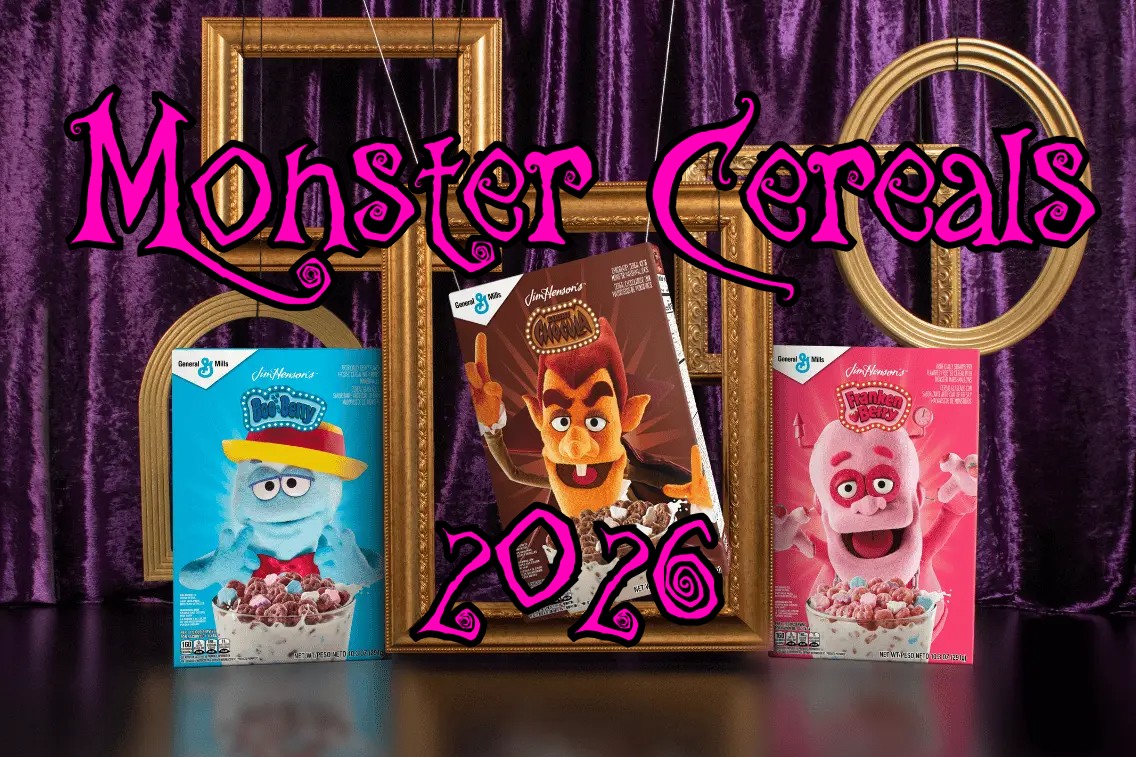
For the past 55 years, Monster Cereals have been a staple of horror-lovers’ breakfasts each Halloween season. Everyone knows these iconic cereals with the horror-shaped marshmallows: the chocolatey “Count Chocula”, the strawberry “Frankenberry”, and the blueberry “Boo Berry”, and some other fun friends over the years. 

In 2025 Monster Cereals partnered with The Jim Henson Company to reimagine these beloved characters as puppets. 2026 brings an encore partnership. “Fans loved Count Chocula, Boo Berry and Franken Berry reimagined through The Jim Henson Company’s creativity last year, so we were excited to team up again to create fresh new packaging designs that celebrate the characters and bring even more Halloween fun to store shelves,” said Megan Brooks, Business Unit Director for Family Favorites Cereal at General Mills.

“Last year, our team from Jim Henson’s Creature Shop had so much fun bringing these beloved Monsters to life as puppets, and we know our fans will enjoy seeing them again this season for more memorable magic,” said Nicole Goldman, Executive Vice President of Branding for The Jim Henson Company. “And new this Halloween, we’re giving cereal and Jim Henson Company fans alike the chance to put their creativity to the test by transforming each cereal box into its own Monster puppet.”

Where to Buy

These limited edition Jim Henson Company designs will be available in retailers nationwide by August. 

Additionally, super fans can score a limited-edition fuzzy Count Chocula cereal box, designed to replicate the fleece-like texture of the puppets, available exclusively on Walmart.com for $7.76 starting October 1st.

Whether this is your first time celebrating the season with the trio or your 55th, Monsters Cereals ensures your Halloween is full of enchanting moments with every spoonful. For more information, follow @generalmills and @hensoncompany on Instagram and Facebook.

Halloween Drawings

Day 27 of the #Emilys100DaysOfHalloween challenge is: Draw a Halloween Picture. My artistic talents reside in photography, film, and papercraft. That, however, does not stop me from picking up a

Read More »

Learn a Halloween Song

Day 26 of the #Emilys100DaysOfHalloween challenge: Learn to Play a Halloween Song. I have been playing the piano since I was a little girl. I love to try new songs

Read More »

Spooky Artists

Day 25 of the #Emilys100DaysOfHalloween challenge is: Support a Horror Artisan. With AI slop flooding the world, now more than ever it is important to celebrate the creativity and beauty

Read More »
Categories
Food Lifestyle

Apple Pie Recipe

Apple Pie Recipe

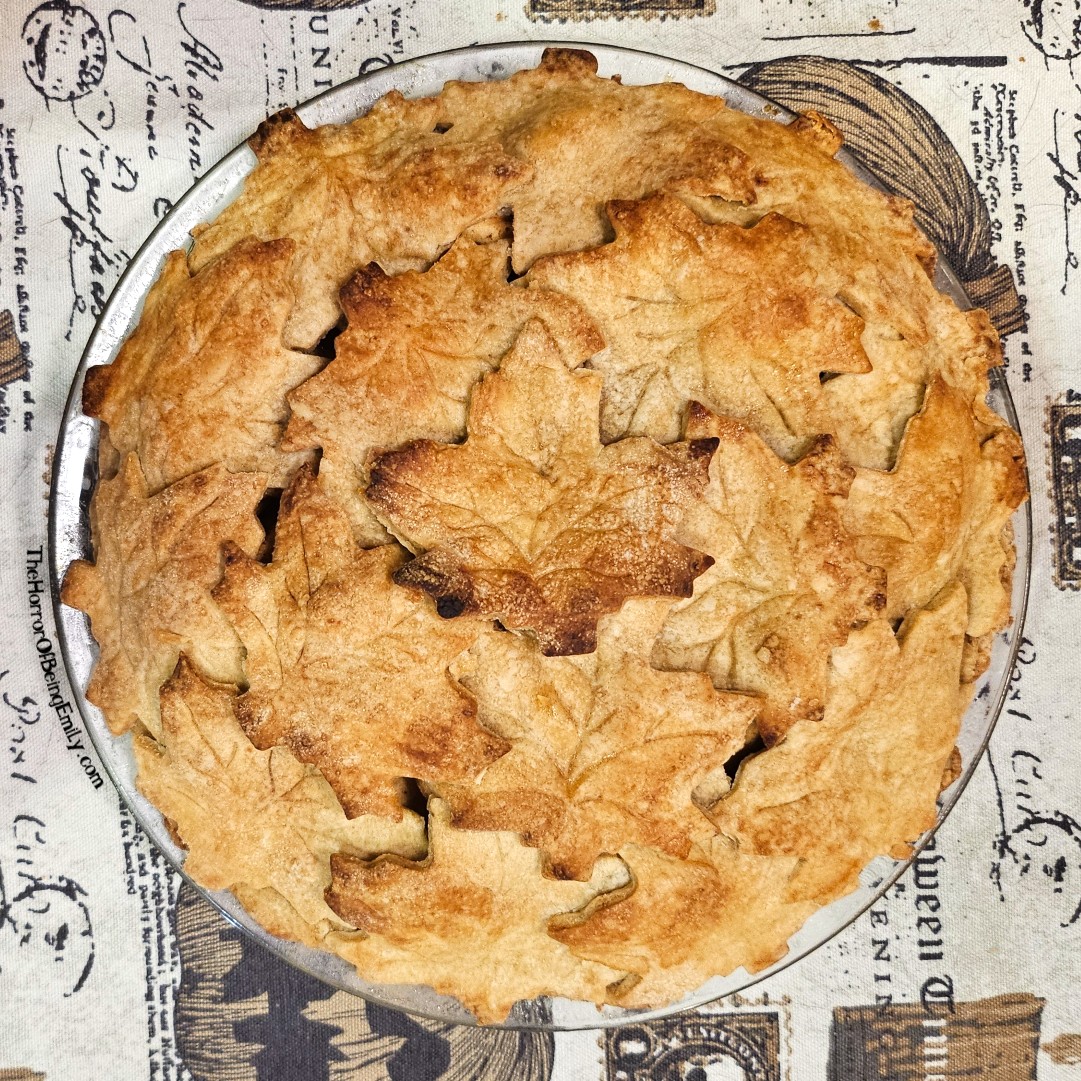
Apple pies are my favorite autumn-inspired desserts. They bring memories of harvests and autumn farm visits, and are a very easy pie to make for beginner bakers.

Below is my personal recipe that I have been perfecting since I was thirteen years old. My great-grandmother used to make all sorts of pies and I grew up hearing how much everyone missed the desserts at family gatherings. So, I decided to experiment with making my own signature sweet crust pies, starting as a 4th of July tradition and then expanding out to Thanksgivings and other friend and family gatherings. Of course, I also learned how to add my own fun Halloween season twists to keep everything in line with my spooky interests.  

Grab a pie pan, rolling pin, cookie cutters, and ingredients – let’s start baking!

Step-By-Step Apple Pie Recipe

  1. Add two cups flour to a medium bowl. Cut in 1 ⅓ cups butter and ¼ cup brown sugar with a pastry cutter or fork until particles are the size of small peas. Salted butter works best here, but if you use unsalted, be sure to add a pinch of salt to the flour). 
  2. Sprinkle with cold water, 1 tablespoon at a time, tossing with a fork (or mixing with a dough hook – if using a stand mixer) until all the flour is moistened and the pastry leaves the sides of the bowl. You may use up to ⅔ cup water here.
  3. Cut the dough in half and gather into two balls. Shape each into a flattened round on a lightly floured surface. Wrap the pastry round in plastic wrap and refrigerate for about 45 minutes or until the dough is firm and cold, yet pliable. If you refrigerate too long and the dough becomes rock hard, let it soften before rolling.
  4. Roll one pastry round on a lightly floured surface, using a floured rolling pin. I sometimes use floured wax paper to keep the dough from sticking to my rolling pin. The dough circle should be 2-3 inches longer than your pie plate. Fold the dough in half and slide it over your plate. Unfold and ease it into the plate, pressing firmly against the bottom and side.
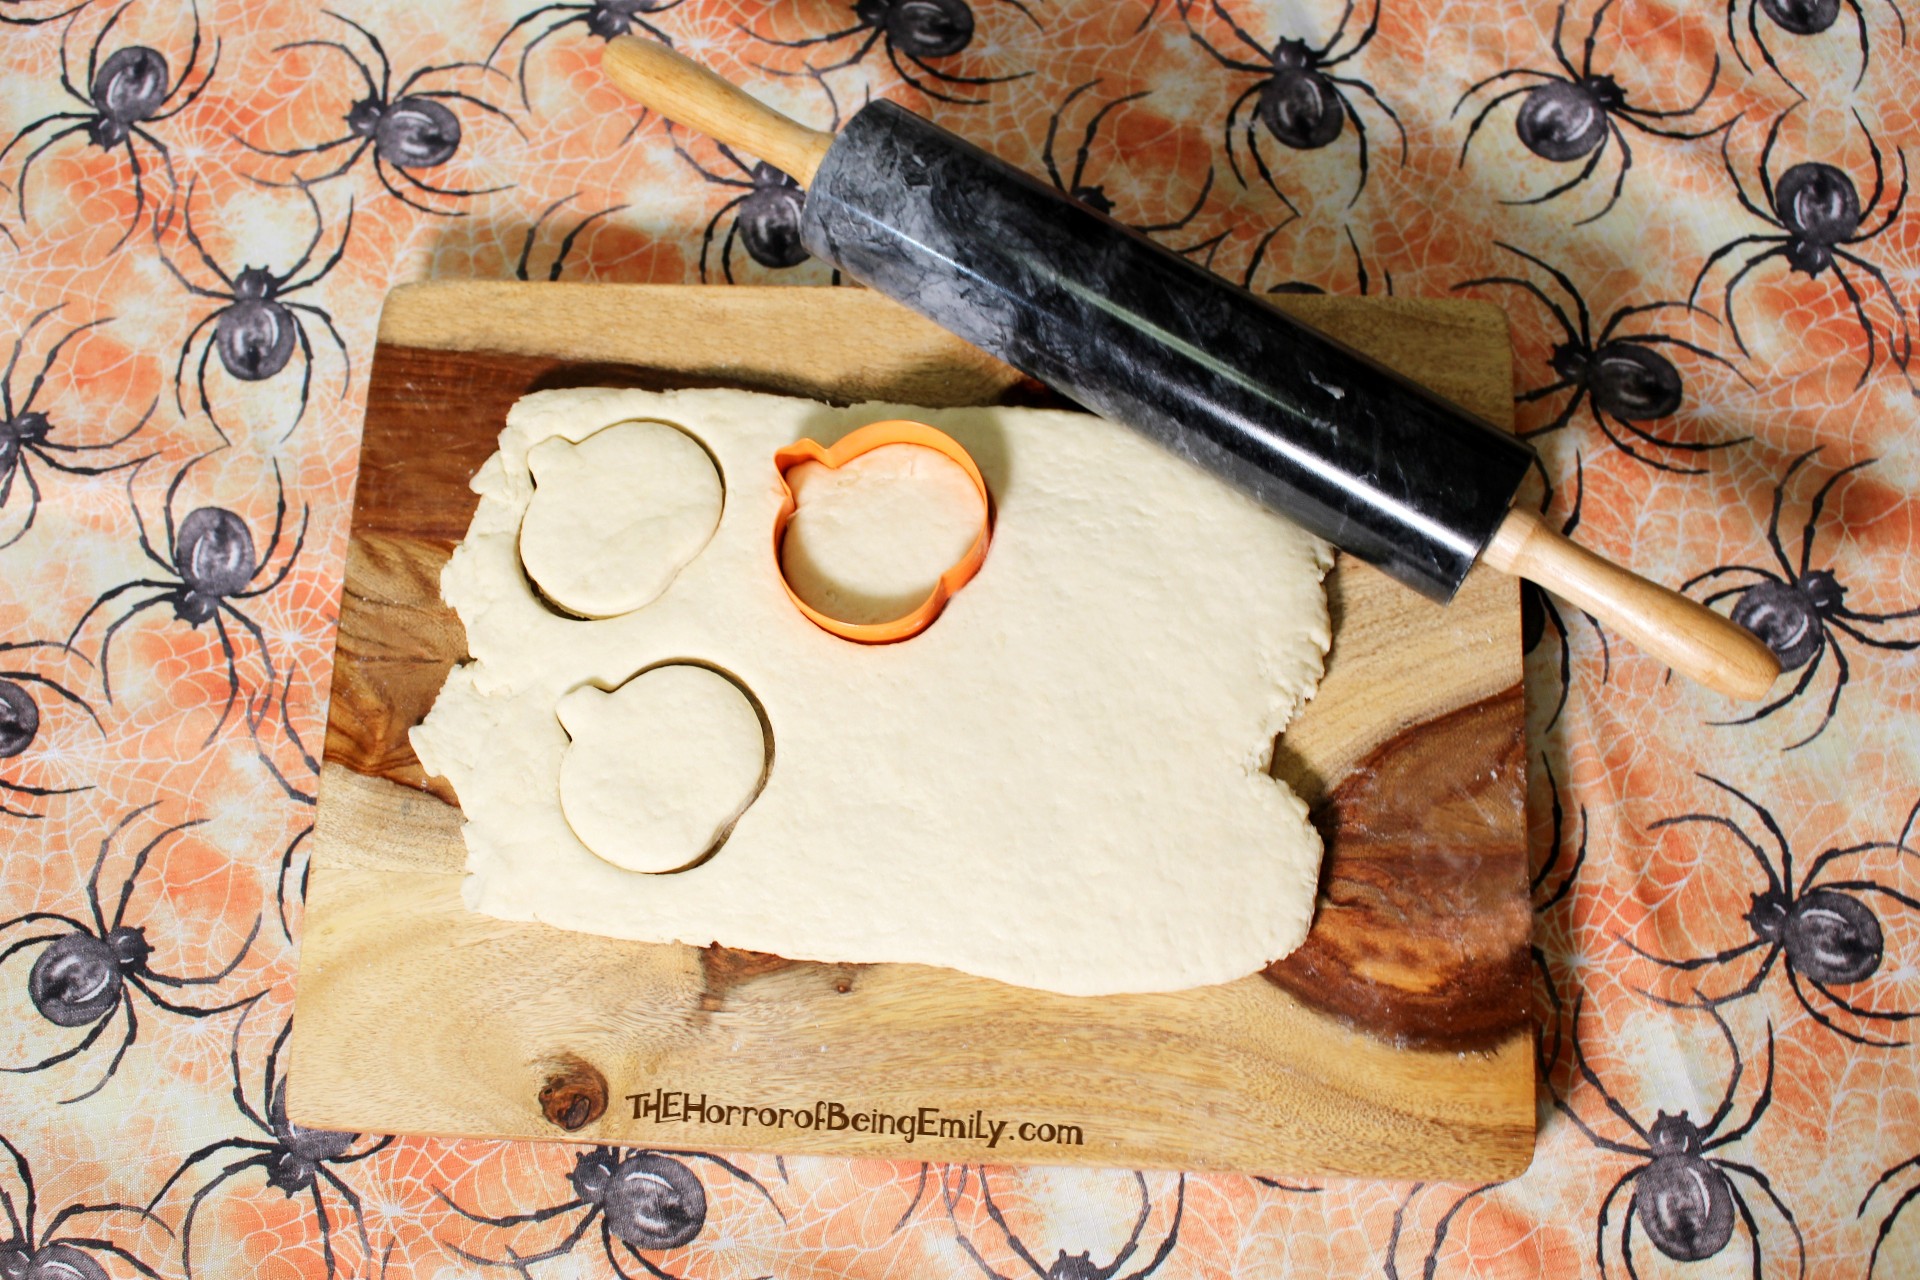
  5. Roll the second pastry round on a lightly floured surface and roll out again to about a ¼ inch thickness. Take a cookie cutter and cut out a variety of dough shapes. Set them aside. Combine any scraps, re-shape into a ball, and repeat the roll & cut process until you have used up all the dough.
  6. Heat your oven to 425°F. 
  7. Peel 8-9 Granny Smith apples and slice them thinly.
  8. In a large bowl, mix ¾ cup brown sugar, 2 tablespoons nutmeg, 3 tablespoons cinnamon, and 2 tablespoons flour. Stir in the apples until they are fully coated with the sugar & spice mixture. Spoon the apples into a pastry-lined pie plate. 
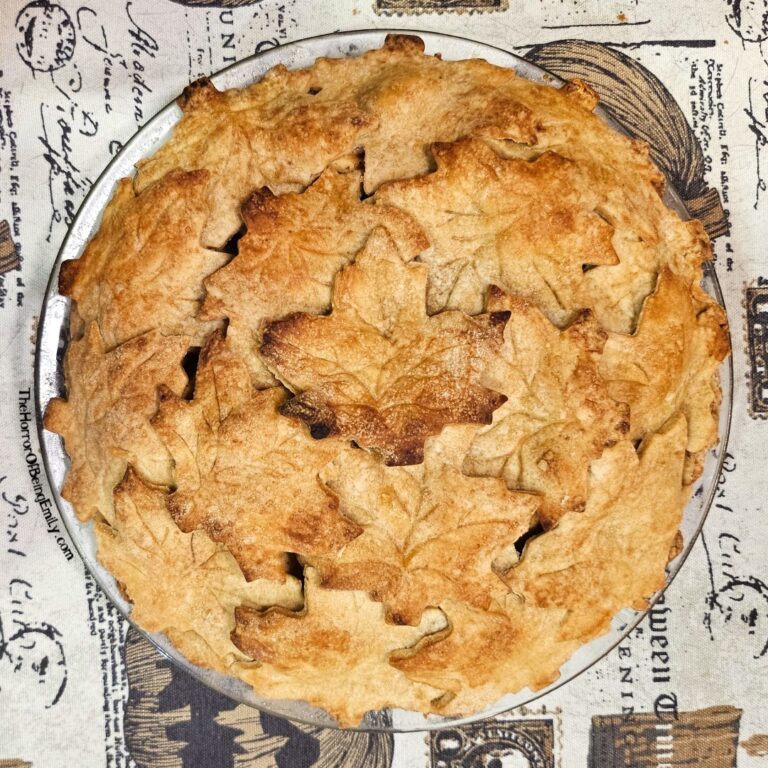
  9. Cover the top of the pie with the cut-out dough pieces to form a pattern as desired. Be sure that there are some holes or slits for the pie to vent while cooking.
  10. Crack and lightly beat one egg (or mix 1 tablespoon maple syrup with 1 tablespoon water for a vegan version). Brush the mixture onto the top of the crust. This will help the crust to brown while backing. 
  11. Cover the pie crust edges with foil to prevent burning. 
  12. Bake 40-50 minutes or until the crust is golden brown and juice begins to bubble through the slits in the crust. 
  13. Cool on a wire rack at for least 2 hours. 

Recipe

Emily Louise Rua

Emily's Apple Pie

Sweet Crust Apple Pie
Cook Time 45 minutes
Servings: 8 Slices
Course: Dessert
Cuisine: American
Calories: 570

Ingredients
  

Crust
  • 2 cups Flour
  • 1 ⅓ cups Butter (or Vegan Butter) Softened
  • cup Water
  • ¼ cup Brown Sugar
Filling
  • 8-9 Granny Smith Apples Peeled & Thinly Sliced
  • ¾ cup Brown Sugar
  • 2 tbsps Nutmeg
  • 3 tbsps Cinnamon
  • 2 tbsps Flour
Egg Wash
  • 1 Egg Lightly Beaten (Optional)
Vegan Alternative Wash
  • 1 tbsp Maple Syrup
  • 1 tbsp Water

Equipment

  • Pie Plate
  • Stand Mixer with Dough Hook (optional)
  • Pastry Cutter (optional) A fork can work too
  • Pastry Brush
  • Rolling Pin
  • Cookie Cutter (optional)

Method
 

  1. Add flour to a medium bowl. Cut in butter and brown sugar with a pastry cutter or fork until particles are the size of small peas.
  2. Sprinkle with cold water, 1 tbsp at a time and toss until all the flour is moistened and the pastry leaves the sides of the bowl. (You may not use the entire ⅔ cup water).
  3. Cut the dough in half and gather into two balls. Shape each into a flattened round on a lightly floured surface. Wrap the pastry in plastic wrap and refrigerate for about 45 minutes or until the dough is firm and cold, yet pliable. If refrigerated longer, let pastry soften before rolling.
  4. Roll one pastry round on a lightly floured surface, using a floured rolling pin. The dough circle should be 2-3 inches longer than your pie plate. Fold the dough in half and slid it over your plate. Unfold and ease it into the plate, pressing firmly against the bottom and side.
  5. Roll the second pastry round on a lightly floured surface and roll out again to about a ¼ inch thickness. Take a cookie cutter and cut out a variety of dough shapes. Set them aside. Combine any scraps, re-shape into a ball, and repeat the roll & cut process until you have used up all the dough.
  6. Heat oven to 425°F. 
  7. Peel 8-9 Granny Smith apples and slice them thinly.
  8. In a large bowl, mix brown sugar, nutmeg, cinnamon, and flour. Stir in the apples until they are fully coated with the sugar & spice mixture. Spoon the apples into a pastry-lined pie plate. 
  9. Cover the top of the pie with the cut-out dough pieces to form a pattern as desired. Be sure that there are some holes or slits for the pie to vent while cooking.
  10. Crack and lightly beat one egg (or mix maple syrup with water for a vegan version). Brush the mixture onto the top of the crust.
  11. Cover the edges of the pie crust with foil to prevent burning.
  12. Bake 40-50 minutes or until the crust is golden brown and juice begins to bubble through the slits in the crust. 
  13. Cool on a wire rack for at least 2 hours.

More Treats (and Possibly Tricks) from Emily

I hope you enjoy my apple pie recipe! Use it as a starting point and add your own spooky tricks to make it your own. If you enjoy this recipe, take a look at some of my other treats:

Vampire-Repelling Shrimp Scampi

Chocolate Coffee Halloween Cupcakes

Pumpkin Cupcakes with Cream Cheese Frosting

Have fun!

Halloween Drawings

Day 27 of the #Emilys100DaysOfHalloween challenge is: Draw a Halloween Picture. My artistic talents reside in photography, film, and papercraft. That, however, does not stop me from picking up a

Read More »

Learn a Halloween Song

Day 26 of the #Emilys100DaysOfHalloween challenge: Learn to Play a Halloween Song. I have been playing the piano since I was a little girl. I love to try new songs

Read More »

Spooky Artists

Day 25 of the #Emilys100DaysOfHalloween challenge is: Support a Horror Artisan. With AI slop flooding the world, now more than ever it is important to celebrate the creativity and beauty

Read More »
Categories
Food

5 Ways to Make Spooky Meals

5 Ways to Make Spooky Meals

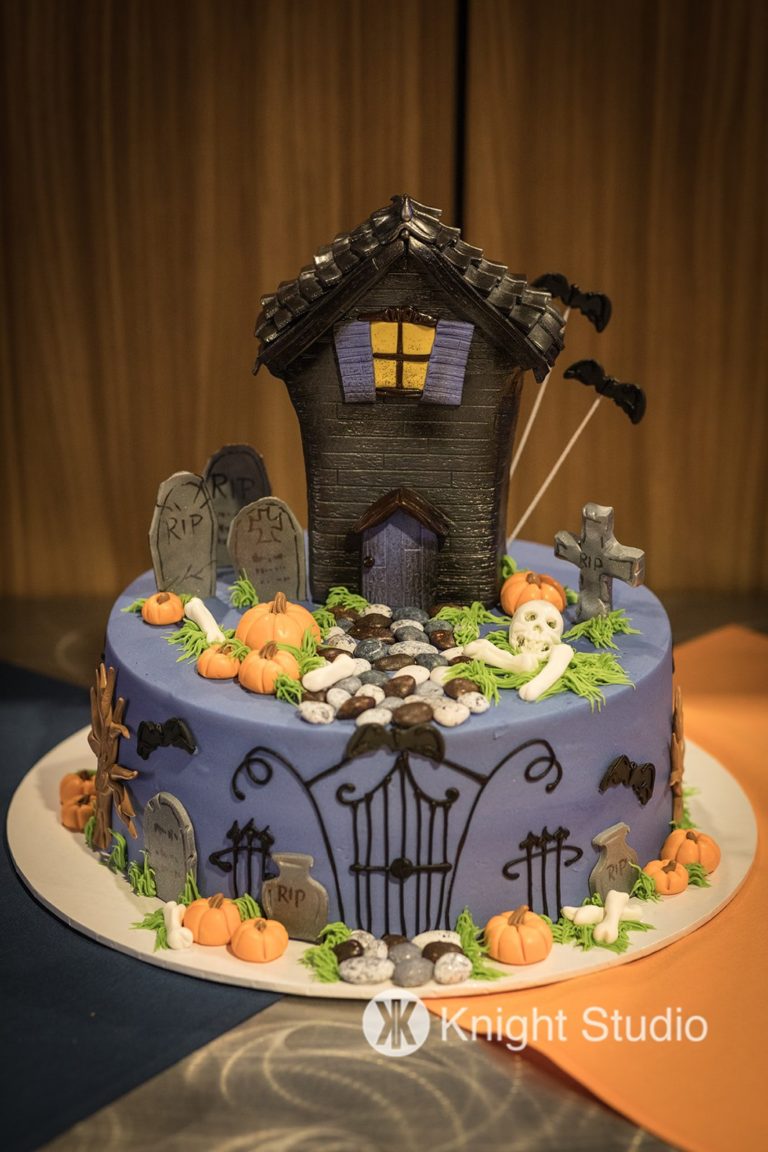
If you spend any time searching for Halloween food on Instagram or Pinterest, you will find a cornucopia of ideas for spooky meals. Sometimes, however, these recipes and designs require far more skill than the average person possesses. Or, they at least take a lot more time and effort than makes sense for an every day meal.

Custom Wedding Cake by Dessert Deli. Photography by Knight Studio. This took hours to make and years of practice to get it to look (and taste) that good.

Not all of us can be Martha Stewarts or Christine McConnells, but there are many easy ways to transform ordinary breakfasts, lunches, and dinners into spooky meals the whole family will enjoy.

Here are some of my favorite easy techniques to add some Halloween-flair to your foods:

1. Use Skull Baking Pans

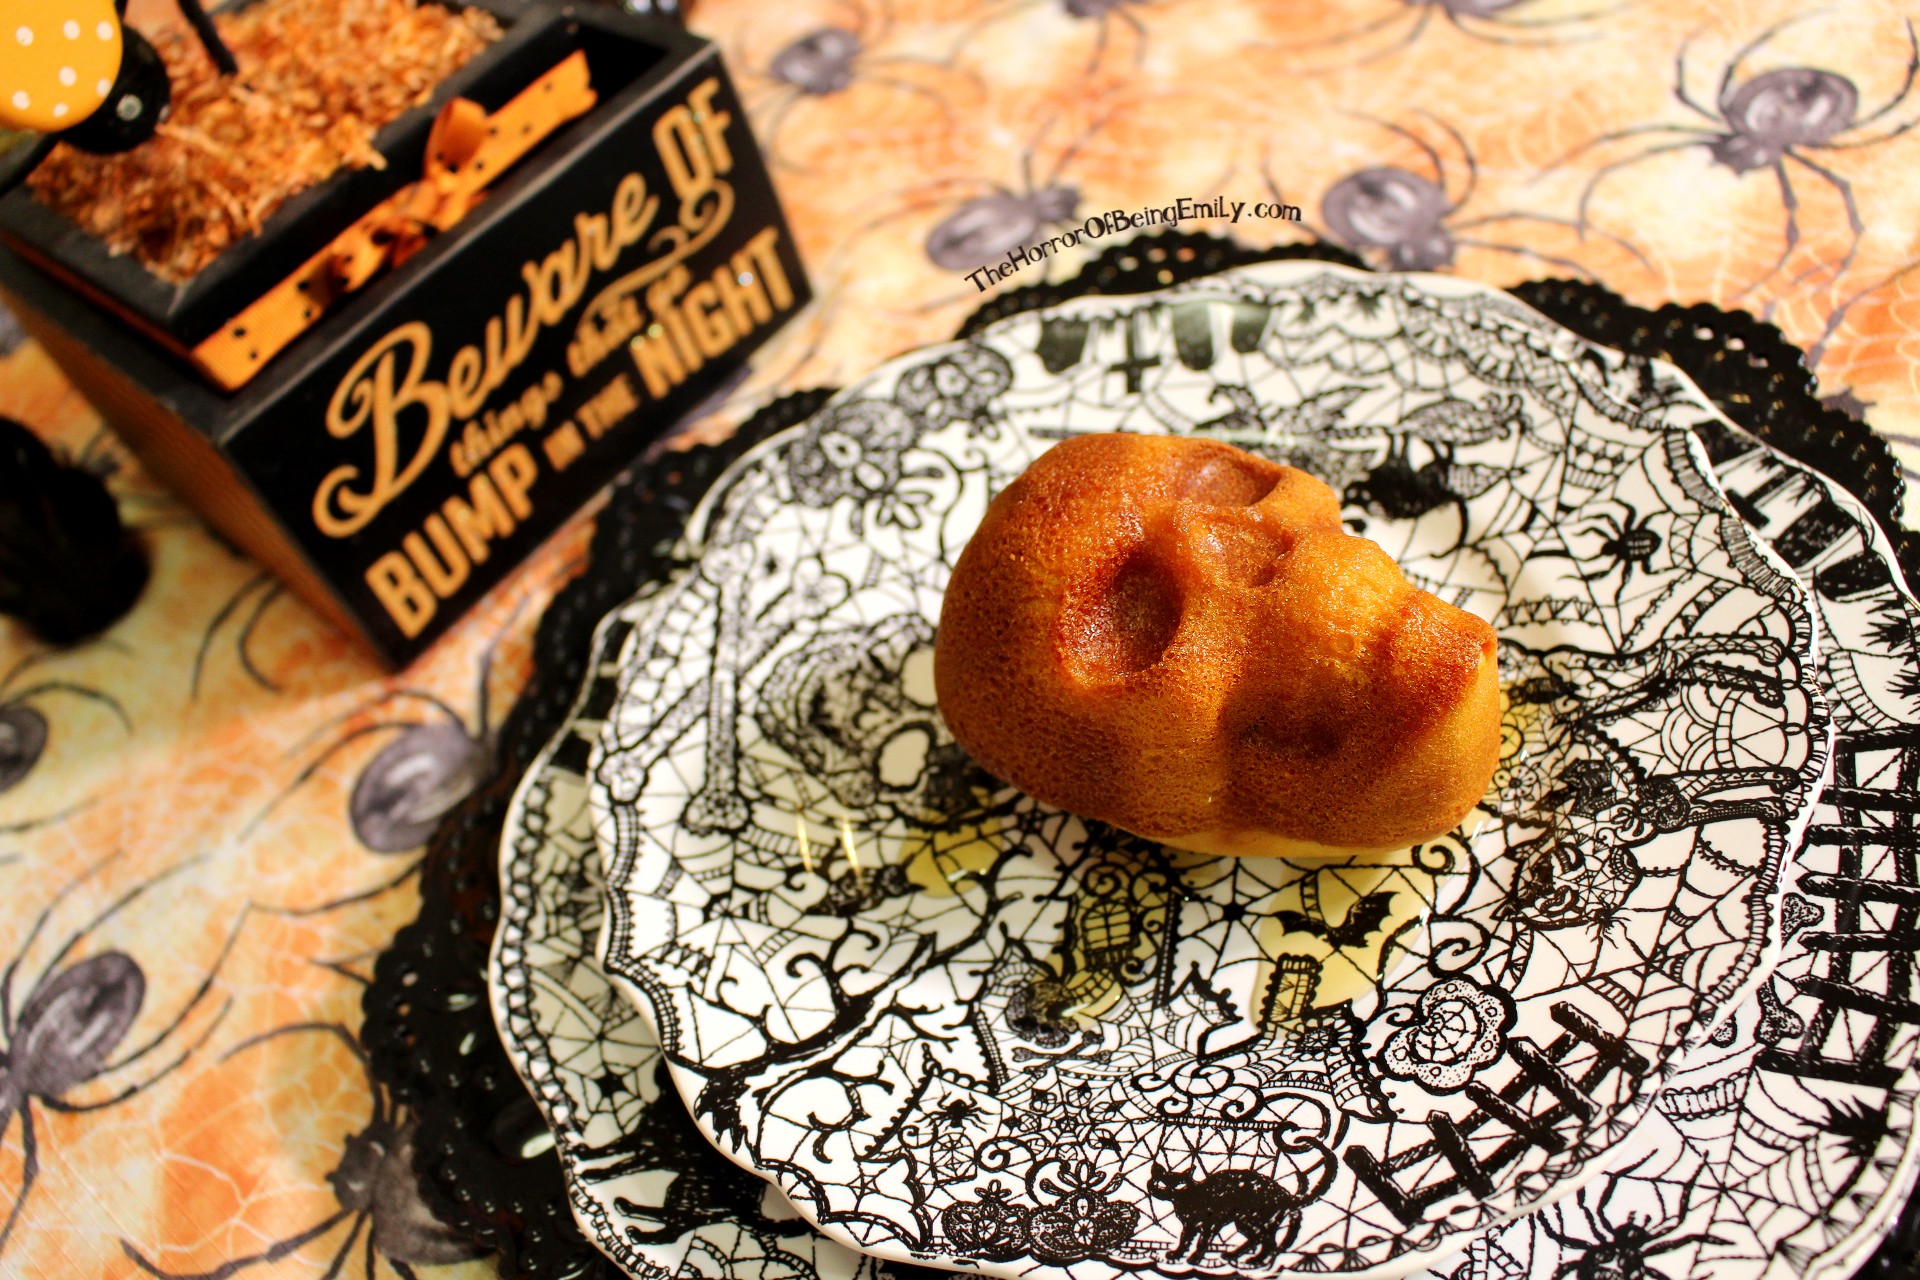
Skull-shaped Cornbread.

One way to add some spookiness to your meals is to use pans with Halloween shapes. Since you have to use pans to make cakes, cornbread, cupcakes, muffins, etc., it is quite easy to switch out a plain square or circular pan for a skull-shaped pan. There are different sizes of pans you can use, from mini skulls to larger ones (like pictured above). Other common Halloween shapes include ghosts, tombstones, and pumpkins. Have fun shopping around during the Halloween season and you can pick up great tools to use all year long!

I used the NordicWare “Haunted Skull Cakelet Pan” for the above-pictured cornbread. Be sure to generously spray or grease the pan and the bread pops out quite easily.

2. Add Halloween Sprinkles

Aside from flour, rice, and sugar, one staple of my pantry is Halloween sprinkles. I am a sprinkle addict and can’t help but to add these sugary toppers to all my desserts and sweet foods. Whether you choose traditional sprinkles in orange and black or specialty shapes like leaves, bats, bones, or pumpkins, sprinkles can add a touch of Halloween to any dessert. I also use them for hot cocoa and smoothie toppers (along with ample amounts of whipped cream).

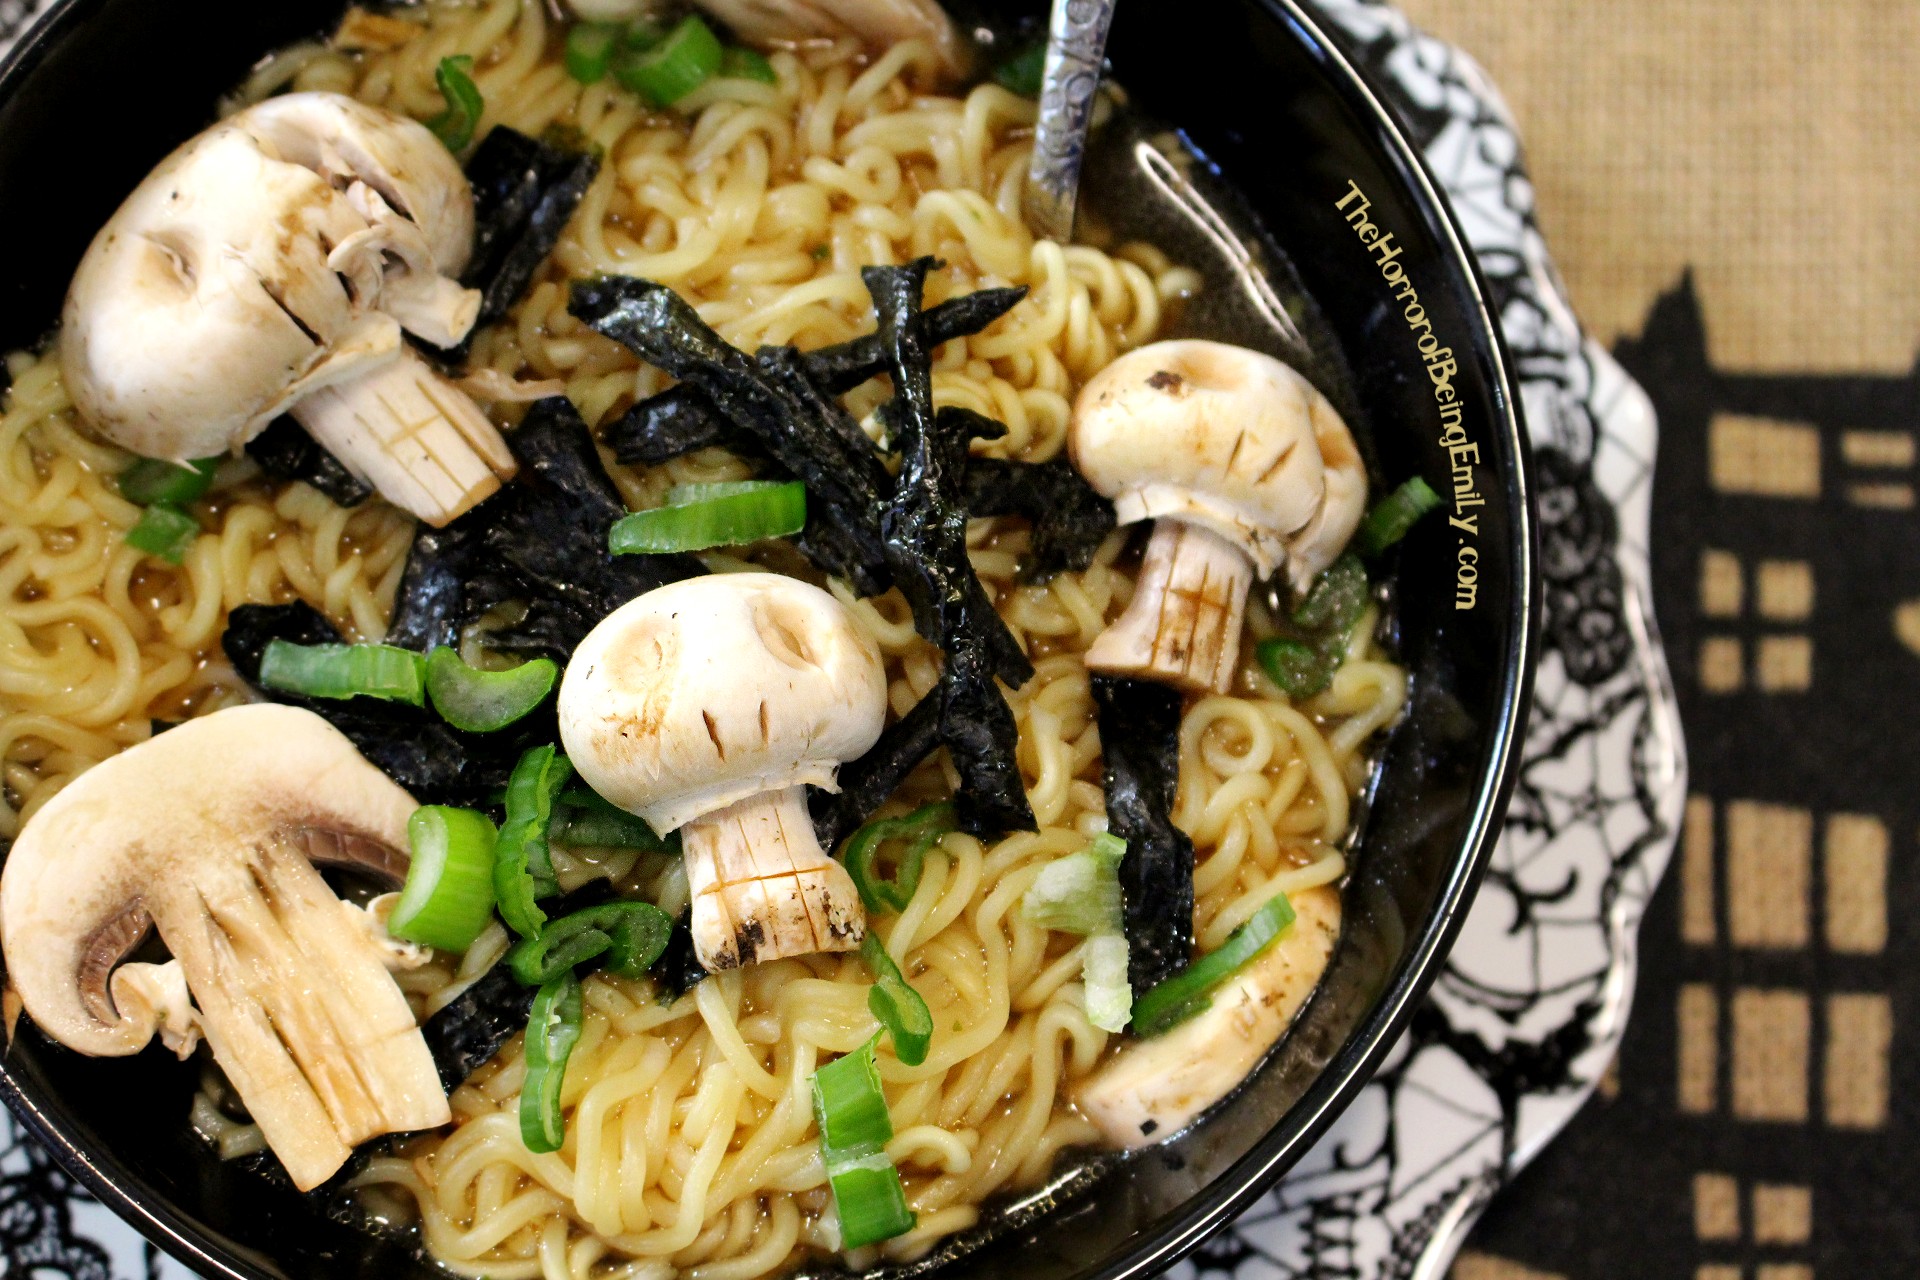
3. Turn Your Mushrooms into Skulls

I'll never be able to eat plain ramen noodles again!

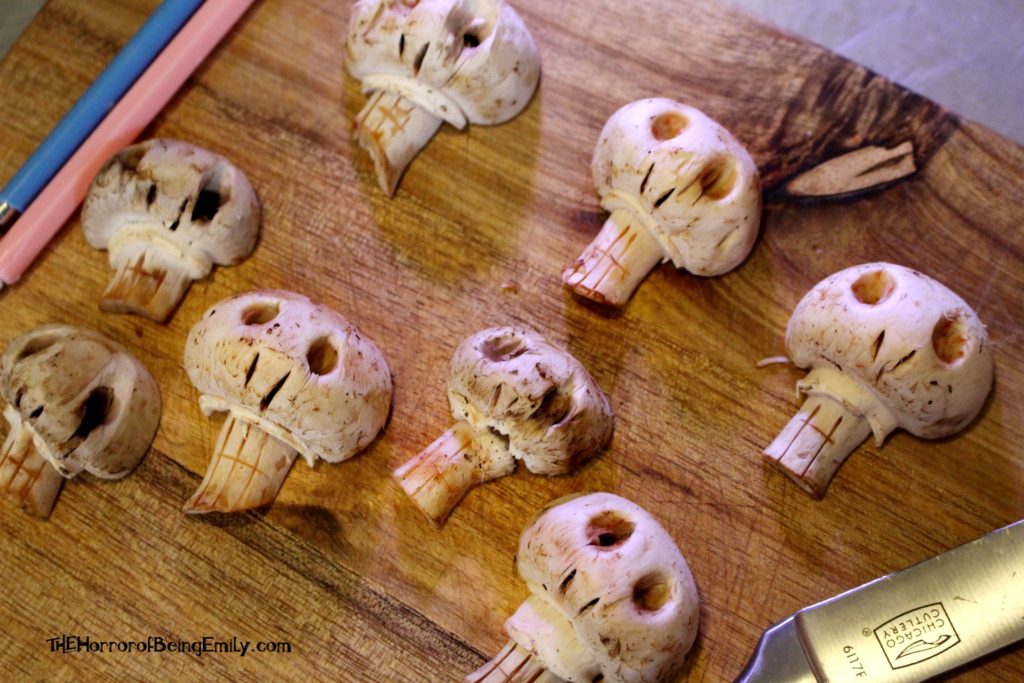
Mushrooms have the perfect shape to carve out some Tim Burton-esque skulls. All it takes to do this is a knife and two fondant tools. I use the “Large Ball” and “Flower Leaf Shaper” fondant tools to carve the face.

HOW TO CARVE A MUSHROOM SKULL
  • Cut the mushrooms in half. Lay the mushrooms flat on a cutting board. Use the knife to cut 3-4 vertical strips on the stems (it is fine if the knife goes all the way through here). Gently make a thin slit horizontally across the vertical strips – do not cut all the way through, only cut halfway or less. These lines are the teeth.
  • Using a flower leaf fondant shaper, dig two little holes for the nostrils. Just pressing down lightly with the tip of the tool generally will suffice.
  • Using a large ball fondant tool press down on the head of the mushroom to create the eyes. Push down very gently. Sometimes you have to press then release a few times to get the proper indent. If you press too hard, the mushroom will split. Split mushrooms are still salvageable, but they look more like decomposing skulls instead of fresh ones!

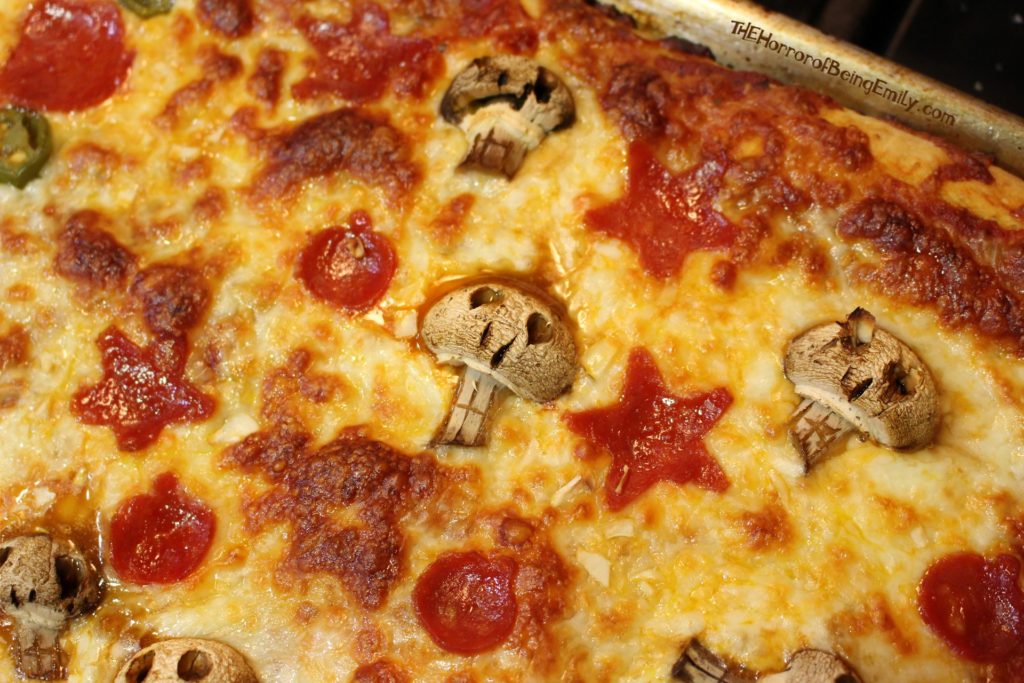
These mushrooms can be used in soups, pizzas, salads, and more.

4. Use Cookie Cutters to Create Spooky Shaped Foods

Despite the name, cookie cutters are not just for cookies! If you have a variety of cookie cutters in various sizes and shapes, you can easily cut your food into spooky designs for your meals.

Pumpkin-shaped biscuits are my go-to for breakfast sandwiches or dinner roll sides. Mini cutters on sour dough bread make cute toppers for chili or chowder soups. You can even get creative with pizza and combine cookie cut-out pepperoni and mushroom skulls.

Combining these two easy techniques make a unique and fun Halloween-themed pizza. Just make sure not to include garlic if you have any vampires over for dinner!

5. Carve a Design

Bat Bread

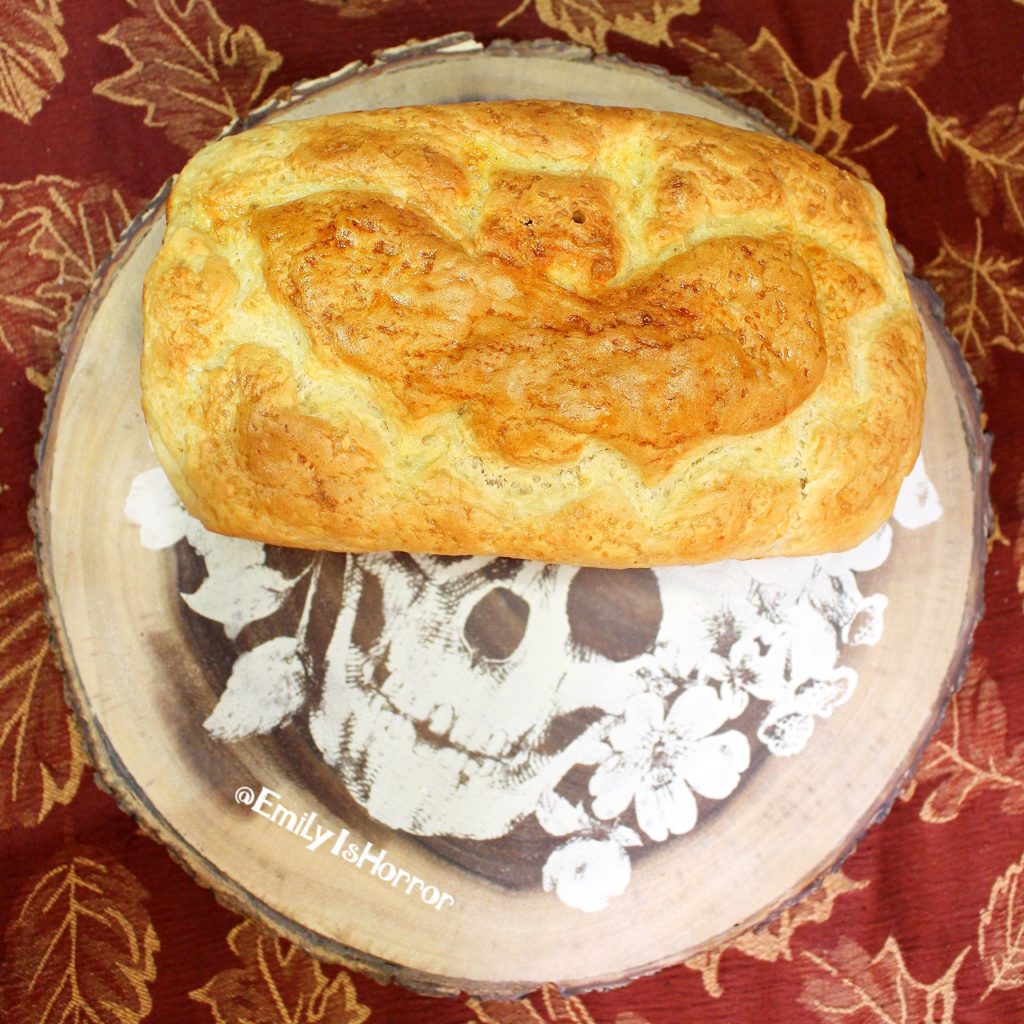
Like most people stuck at home during the COVID-19 pandemic, I too jumped aboard the bread-making bandwagon. From plain white bread to herbaceous stuffing loaf bread, I baked many loaves. Although they turned out well (after my first few tries), they just didn’t feel spooky enough. One day when I was about to score the top of the loaf, I got the idea to carve a spooky image instead of just scoring in a straight line. I enjoy making bat bread, but you can also design a smiling jack-o-lantern or other Halloween image.

This makes for a fun presentation and adds spooky Halloween fun to an otherwise completely normal dish.

Tell Me About Your Spooky Meals


That’s it for my 5 simple ways to add a little spookiness to your daily meals. I look forward to sharing more tips in future posts.

Now I want to hear from you! How do you add touches of Halloween to your meals? Let me know on Instagram & Twitter @EmilyIsHorror


Halloween Drawings

Day 27 of the #Emilys100DaysOfHalloween challenge is: Draw a Halloween Picture. My artistic talents reside in photography, film, and papercraft. That, however, does not stop me from picking up a

Read More »

Learn a Halloween Song

Day 26 of the #Emilys100DaysOfHalloween challenge: Learn to Play a Halloween Song. I have been playing the piano since I was a little girl. I love to try new songs

Read More »

Spooky Artists

Day 25 of the #Emilys100DaysOfHalloween challenge is: Support a Horror Artisan. With AI slop flooding the world, now more than ever it is important to celebrate the creativity and beauty

Read More »
Categories
Food

Vampire-Repelling Shrimp Scampi

Vampire-Repelling Shrimp Scampi

Shrimp Scampi Recipe

Today’s post will focus on the recipe for Vampire-Repelling Shrimp Scampi. This garlic-rich recipe is simple, yet delicious. I love to make this recipe on a Friday night before watching a horror film or two. Last time I made it, the kitchen smelled like garlic for an entire day afterwards, ensuring that we were safe from creatures of the night (and any visitor, really).

As with most scampi pasta dishes, this recipe can be highly customized and you can change it up depending on the ingredients you have on-hand. For a pop of color – add sun-dried tomatoes. Mushrooms can be added for extra Vitamin D. The possibilities are limitless!

Basic Vampire-Repelling Shrimp Scampi Recipe(Makes about 2 Servings):

Ingredients:

  • 2 tablespoon olive oil
  • 3 cloves garlic, minced
  • 2/3 cup onion, diced
  • ¼ cup fresh basil
  • ¼ teaspoon crushed red pepper
  • 1 tablespoon parsley
  • ¼ teaspoon salt
  • ¼ teaspoon pepper
  • 16 large shrimp, peeled & de-veined
  • 8 tablespoons unsalted butter
  • 2 tablespoons lemon juice
  • 1/3 cup white wine
  • 2 tablespoons Parmesan cheese
  • 2 servings spaghetti
  • Optional – ½ cup mushrooms, chopped
  • Optional – ¼ cup sun-dried tomatoes

Step One: Prep Pasta

Bring a pot of salted water to a boil and add the spaghetti. Cook until tender.

Shrimp Scampi Pasta Uncooked

I chose to use orange and green vegetable pasta for a more Halloween-feel, but once cooked they did not have as bright colors as I had hoped. If you have a higher budget, specialty squid ink pasta has a delightful black color to make this meal very spooky.

Step Two: Brown Onion & Garlic

Heat the olive oil in a large pan on medium heat. Add the onion. Let brown. Add garlic.

Brown the onion and garlic in your large pan.

It typically takes about five to eight minutes for the onion to brown, depending on your pan. You can stir occasionally and/or rotate the pan to make sure all the onion is browning mostly evenly.

Step Three: Cook Shrimp

Add the shrimp (and optional mushrooms) to the pan. Season with the basil, crushed red pepper, salt, pepper, and parsley. Flip the shrimp once the underside is a bright pink. Cook through.

Step Four: Add Scampi Sauce Ingredients

Add butter, lemon juice, white wine, and parmesan cheese. The optional sun-dried tomatoes can be added as well. Stir occasionally for 5 minutes.

The shrimp should be a nice pink color once cooked through.

The scampi sauce will reduce during this time. You should be able to smell the garlic throughout your kitchen by this time. Vampires beware!

Step Five: Combine

We have not forgotten about the pasta! Remove the cooked spaghetti from the pot using tongs and place into the pan with the shrimp scampi mixture. Use tongs instead of draining the pasta – bringing over some pasta water with the spaghetti helps the scampi sauce to stick to the noodles more.

Using tongs allows some of the pasta water to be brought over with the spaghetti.

Thoroughly coat the spaghetti with the scampi sauce.

Mix it well.

Now, you just have to plate it. Add your favorite garlic bread for a complimentary side and you are all set! For those more vampire-friendly individuals, you can reduce or cut down on the garlic, but I love the strong garlic taste.

Shrimp Scampi Recipe
Vampire-Repelling Shrimp Scampi

Enjoy!

Vampire-Repelling Shrimp Scampi

Shrimp Scampi Recipe
The Horror of Being Emily

Vampire-Repelling Shrimp Scampi

Learn to make this garlic-heavy shrimp scampi, the perfect recipe to repell vampires and other creatures of the night. Easy to cook and made to impress!
Prep Time 10 minutes
Cook Time 25 minutes
Total Time 35 minutes
Servings: 2 Vampire Hunters
Course: Main Course
Cuisine: Italian

Ingredients
  

  • 2 tbsp olive oil
  • 3 cloves garlic minced
  • 2/3 cup onion diced
  • 1/4 cup fresh basil chopped
  • 1/4 tsp crushed red pepper
  • 1/4 tsp salt
  • 1/4 tsp black pepper
  • 1 tbsp parsley
  • 16 large shrimp peeled, de-veined
  • 8 tbsp unsalted butter
  • 2 tbsp lemon juice
  • 1/3 cup white wine
  • 2 tbsp Parmesan cheese
  • 2 servings spaghetti
  • 1/2 cup mushrooms (optional)
  • 1/4 cup sun-dried tomatoes (optional)

Equipment

  • Large Pan
  • Large Pot
  • Tongs

Method
 

  1. Bring a pot of salted water to a boil and add the spaghetti. Cook until tender.
  2. Meanwhile, heat the olive oil in a large pan on medium heat. Add the onion. Let brown. Add garlic.
  3. Add the shrimp (and optional mushrooms) to the pan. Season with the basil, crushed red pepper, salt, pepper, and parsley. Flip the shrimp once the underside is a bright pink. Cook through.
  4. Add butter, lemon juice, white wine, and Parmesan cheese. The optional sun-dried tomatoes can be added as well. Stir occasionally for 5 minutes.
  5. Remove the cooked spaghetti from the pot using tongs and place into the pan with the shrimp scampi mixture. Thoroughly coat the spaghetti with the scampi sauce.

Halloween Drawings

Day 27 of the #Emilys100DaysOfHalloween challenge is: Draw a Halloween Picture. My artistic talents reside in photography, film, and papercraft. That, however, does not stop me from picking up a

Read More »

Learn a Halloween Song

Day 26 of the #Emilys100DaysOfHalloween challenge: Learn to Play a Halloween Song. I have been playing the piano since I was a little girl. I love to try new songs

Read More »

Spooky Artists

Day 25 of the #Emilys100DaysOfHalloween challenge is: Support a Horror Artisan. With AI slop flooding the world, now more than ever it is important to celebrate the creativity and beauty

Read More »